

NGINX – is Web server, which is inherent in open source. It has very powerful features that balance the load of reverse proxy and caching. Initially, it was designed to solve the problem of scaling and concurrency with existing web servers. We will consider the installation of this web server on the Ubuntu 18.04 Operating System, which is already included in the Ubuntu repository.
What you need to do
The first is to update the command
apt updateThen install the NGINX web server
apt install nginxThe configuration file will be located will be located in /etc/nginx/sites-available, indicated by the references /etc/nginx/sites-enabled/ Next you need to create a separate source file in the sites-available directory for each domain or subdomain and set up the sites-enabled link
1. Copy the default configuration file. Replace example.com with your domain name;
/etc/nginx/sites-available/default /etc/nginx/sites-available/example.com
2. On the installed web server, disable the default configuration. You must use the following direction: /etc/nginx/sites-enabled/
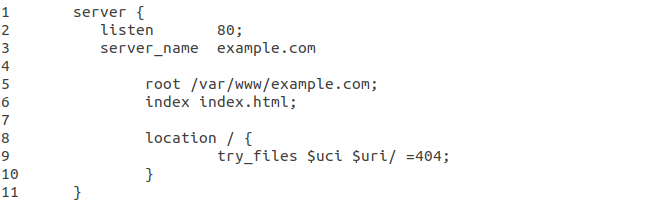
unlink /etc/nginx/sites-enabled/default3. Next, open your site’s configuration file in a text editor. Replace example.com in the server_name directive with your domain name or IP address of your site.
Verification after installation
Check for errors
sudo nginx -tReboot
sudo nginx -s reload
Leave A Comment?
You must be logged in to post a comment.