
SSH, also known as Secure Shell or Secure Socket Shell, is a network protocol that gives users, particularly system administrators, a secure way to access a computer over an secured network. SSH also refers to the suite of utilities that implement the SSH protocol. By default SSH works on 22 TCP port. One of the security features of SSH is that when you log in to a cloud server, the remote host has its own key that identifies it. When you try to connect, your SSH client checks the server’s key against any keys that it has saved from previous connections to that IP address. After you rebuild a cloud server, that remote host key changes, so your computer warns you of possibly suspicious activity.
In order to connect to a remote server via SSH, please perform the following steps:
If you are Linux/MacOS user:
Open the terminal application
Type the following command:
ssh username@ipaddressIn case you are trying to connect to the server at the first time, you will get the following output:
The authenticity of host servername (server_IP) can’t be established. RSA key fingerprint is a9:bb:55:35:86:xx:xx:00:xx:00:2b:2c:79:10:96:3c. Are you sure you want to continue connectingIn order to proceed with connection, type the word ‘yes’, then insert your password. Done! Now you are connected to your remote server via SSH.
If you are Windows user:
Download SSH client, as an example, PuTTY
Start putty.exe and enter the following connection details in the Sessions category:
- Host Name (or IP address) – here you should enter the host/IP to which you wish to connect;
- Port – the port for the connection – by default, SSH is running on 22 TCP port;
- Protocol – here you should select SSH.
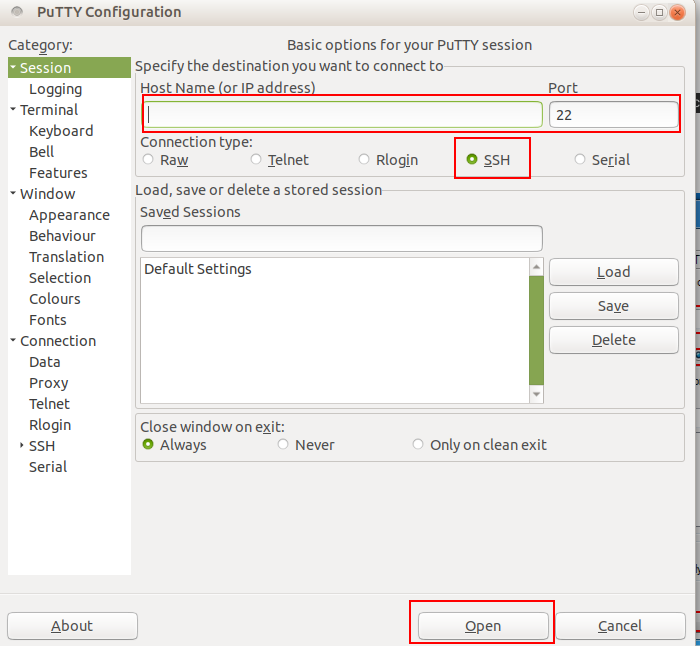
Once you enter the correct connection data, click on Open button. There will open another window asking for your login and password. Enter your login credentials and press enter.