
On your own VMmanager panel of the virtual server, you can change the PTR records yourself. This manual will describe all the detailed steps so that you can complete this procedure quickly, correctly, and without downtime. Updates to PTR records usually happen very quickly, but sometimes this process can take several hours. So, follow this tutorial.
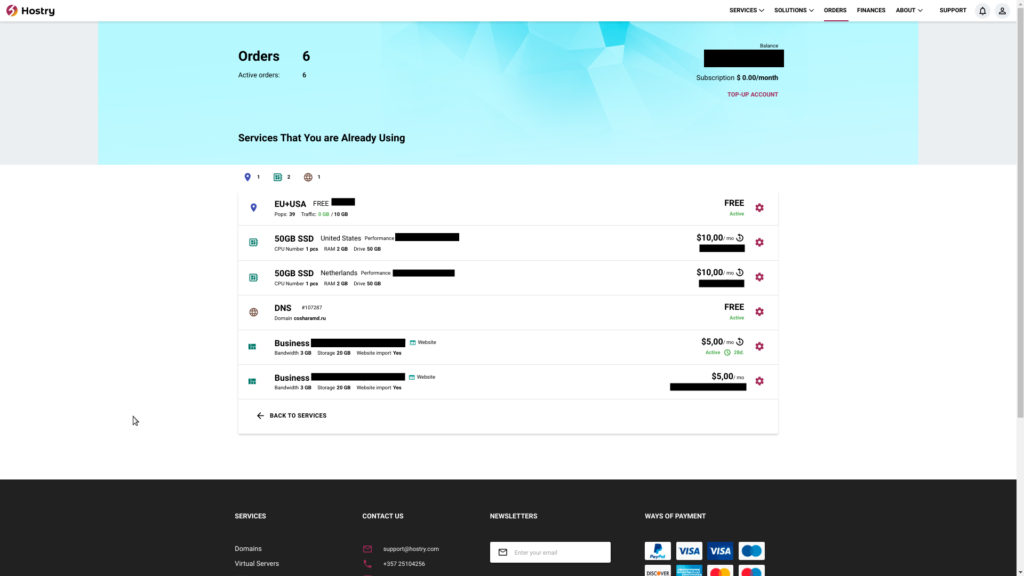
The first step is to go to your account, log in and go to the orders page. If you do not currently have active virtual server services, you can familiarize yourself with tariff plans and order a suitable server here.
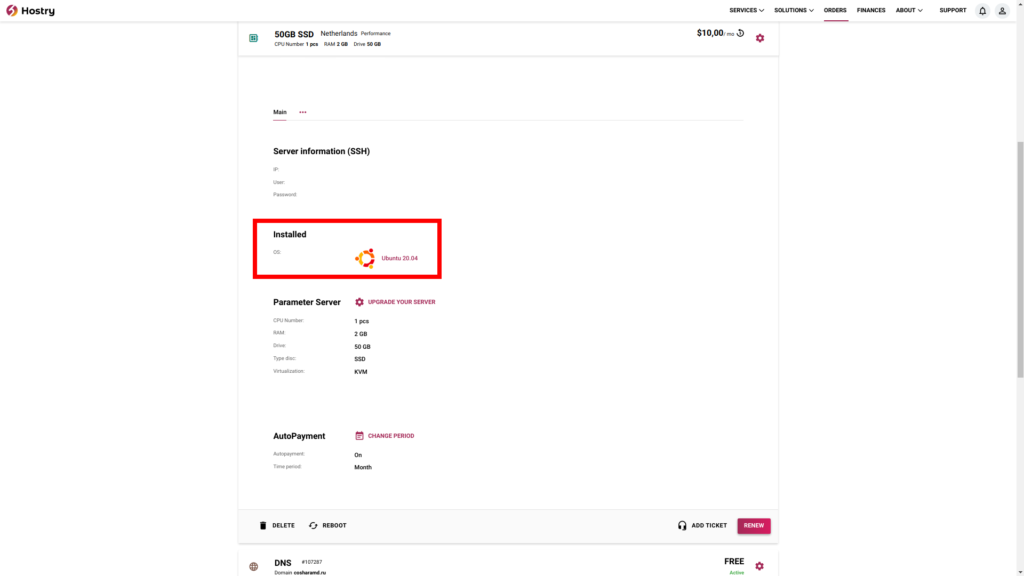
Next, you need to find the required server and go to the “OS” section
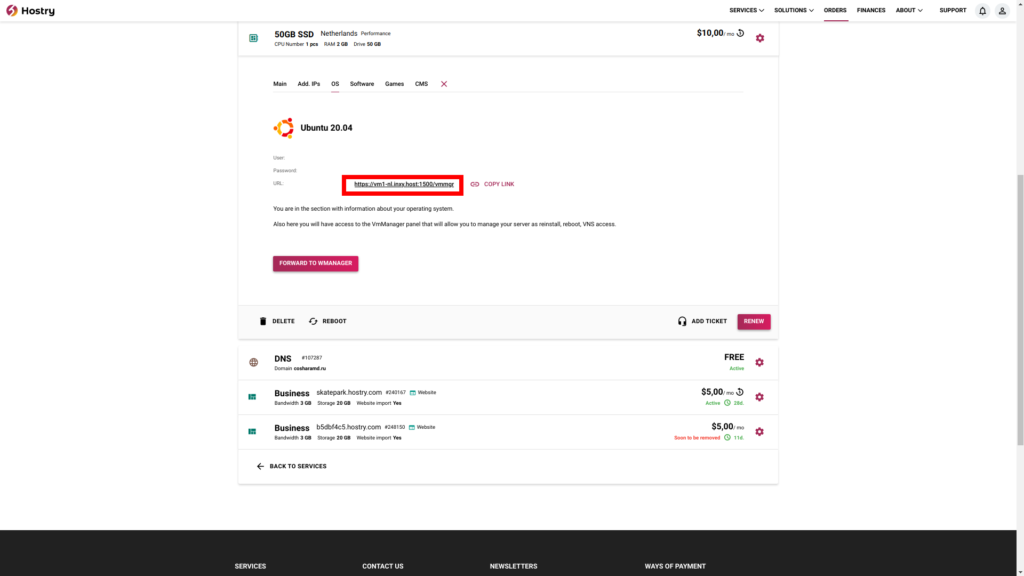
By clicking on this section, you will see a link to your own VMmanager. Then you need to go to her
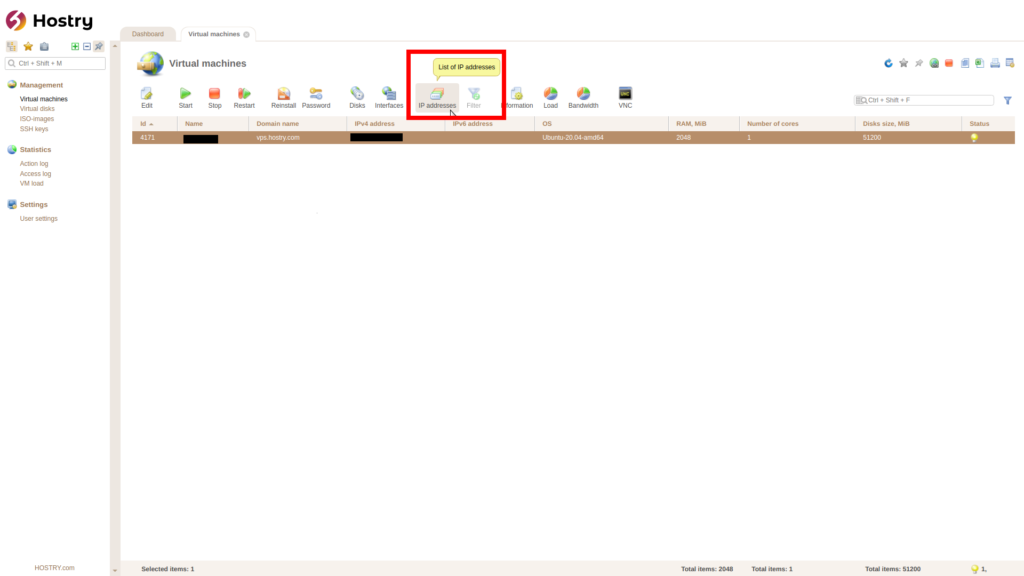
After you have opened the VMmanager section, you should go to the “IP Addresses” section. If you have additional IPv4 addresses, then you will be shown there all the currently available IPv4. At the moment, the interface IPv4 address will be changed.
After that, click on the required IPv4 address and click on “Edit“
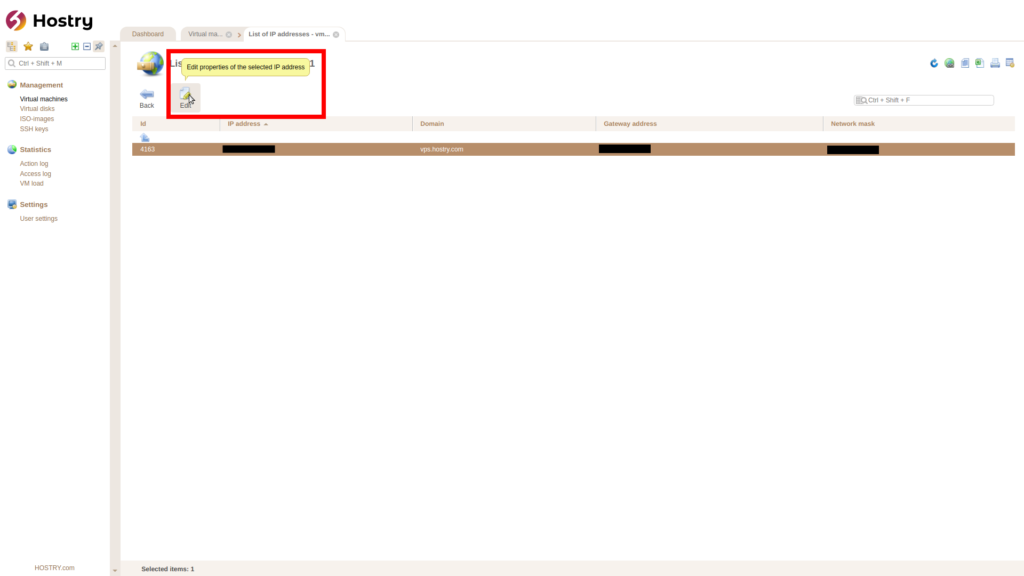
By default, the following entry is set on all VPS
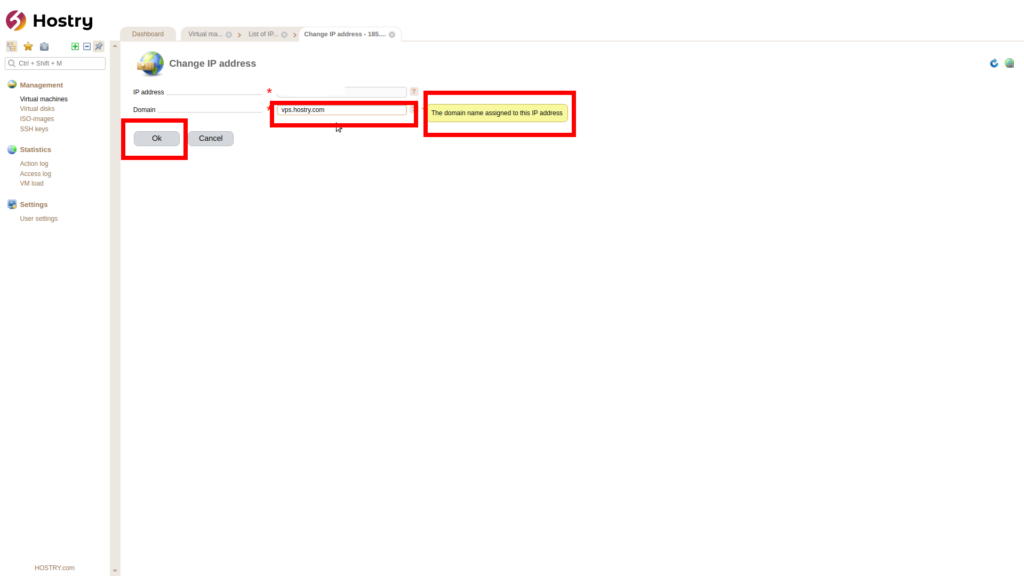
vps.hostry.com
You need to enter your desired PTR record value in the “Domain” line, then click on “OK“
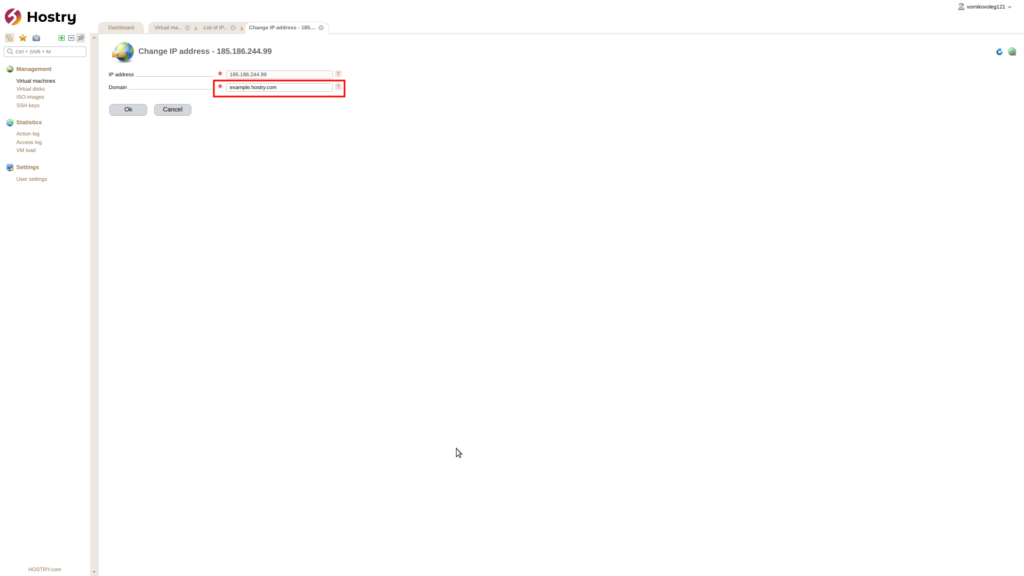
In order to clearly show, the entry has been changed
example.hostry.com
After 3 minutes, the PTR record was successfully changed. You can check it at the link
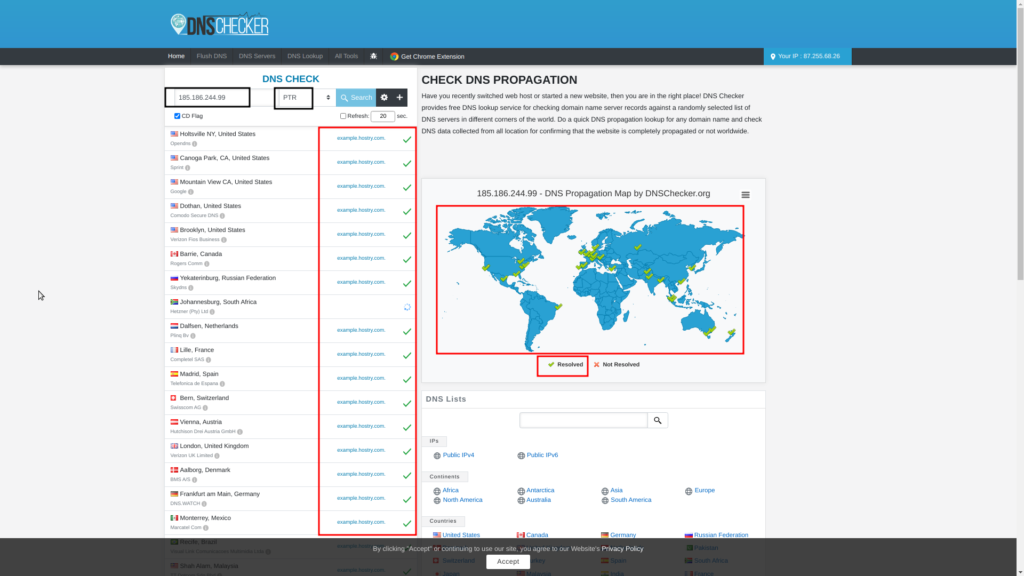
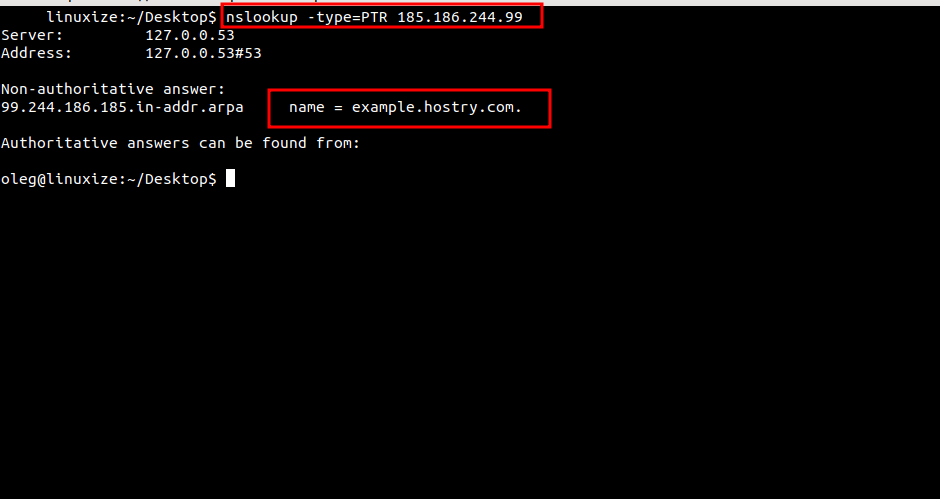
You can also check this with the following command:
nslookup -type=PTR your _IP_address
Leave A Comment?
You must be logged in to post a comment.